


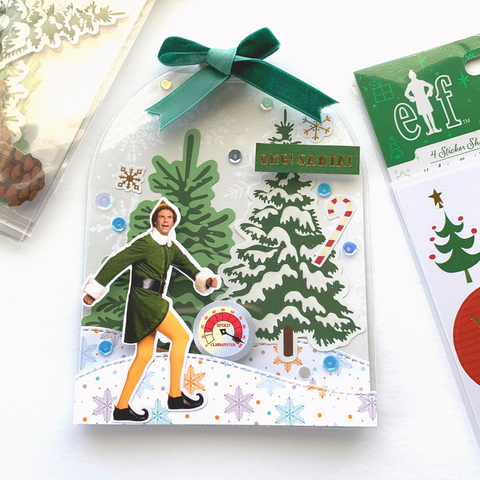
Buddy the Elf DIY Snow Globe Card
If you like making cards AND you like the movie, Elf, you will love this versatile Elf snow globe card designed by Creative Team member, Kinjal! It reminds us of the scene in the movie when Buddy sees New York City in his snow globe and then sets out for the Big Apple to find his Dad!
This is a versatile project that can be used as a card with a note written on the back, a tag for a special gift, or as an ornament. Hang it from your tree or place it on an acrylic easel to decorate your desk, fireplace mantel, or wherever you need some of Buddy's Christmas Cheer.
No matter how you use this card, we suggest making two -- one to give away and one to keep!
Supplies needed:
- Pine Trees Die Cut Stickers Pack
- Peace, Joy, Love Scrapbook Paper
- Just Chillin' Tags Scrapbook Paper
- Elf Stickers Pack
- Clear acetate sheet
- Dome-shaped die
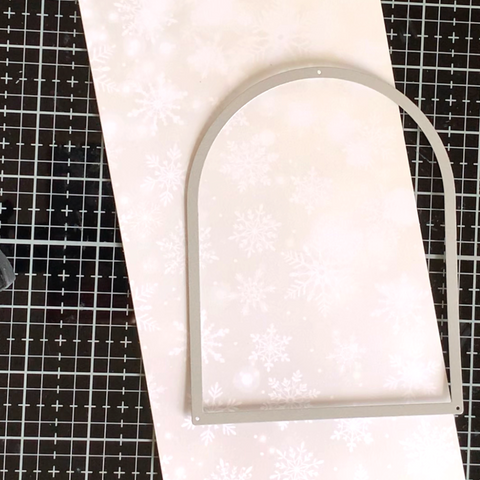
Step 1 - Create Snowy Background
Using a dome-shaped die, cut out this snowflake scene from side B of the Peace, Joy, Love Scrapbook Paper. Repeat to cut a dome from a sheet of clear acetate.
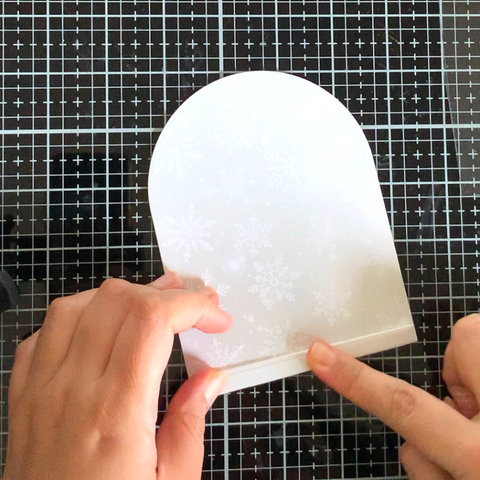
Step 2: - Add Dimensional Adhesive Strips
To create dimension between the bottom and top layers of your snow glode, add a strip of double-side foam adhesive all the bottom edge of the Peace, Joy, Love Scrapbook Paper layer. Add a small piece at the top of the dome as well.
Step 3: Create a Wintery Scene
For this step, I added the green pine tree die-cut sticker to the background layer shown in Step 2.
Next, I cut some wavy hills from side B of the Just Chillin' Scrapbook containing the snowflakes and adhered it just above the dimensional adhesive strip. I like how this whimsical snowflake pattern coordinates with the Elf theme. (You'll need two pieces of the wavy hills. Save the second piece for Step 4.)
I then placed the snow-covered pine tree die-cut sticker slightly atop the snowy hill layer as shown below. I also added the candy cane and "Clausometer," stickers, and a few sequins to my wintery scene.


Step 4: Attach the "Glass Dome" to the Background Layer
Peel the backing off of the dimensional adhesive strips applied in Step 2 and attach the acetate dome from Step 1 to the dimensional so that the acetate layer rests over your background layer.
Cover the bottom piece of foam adhesive that can be seen through the acetate with the second piece of wavy hills we cut in Step 3.


Step 5: Add Buddy the Elf to Your Scene
Place the large Buddy the Elf sticker over the wavy hills added to the outside of the acetate dome layer in Step 4.
Next, add the "OMG! Santa!" sticker or another sticker to the outside of the acetate layer.
Last, cover the top piece of exposed foam adhesive with a bow or a sticker. I decided to use a bow, which I attached with a glue dot.


I hope you have fun making this Buddy the Elf Snow Globe card. Please post it and tag or mention Paper House Productions!
Checkout Kinja's video tutorial on Instagram!